To connect AirPods to a MacBook, press and hold the button on the back of the AirPods case, then go to the Bluetooth settings on your MacBook and select your AirPods to connect. In this step-by-step guide, we will show you how to easily connect your AirPods to your MacBook.
Whether you’re using AirPods Pro or the regular AirPods, the process is simple and quick. By following these easy steps, you’ll be able to enjoy wireless audio on your MacBook in no time. So let’s dive in and get started with connecting your AirPods to your MacBook.

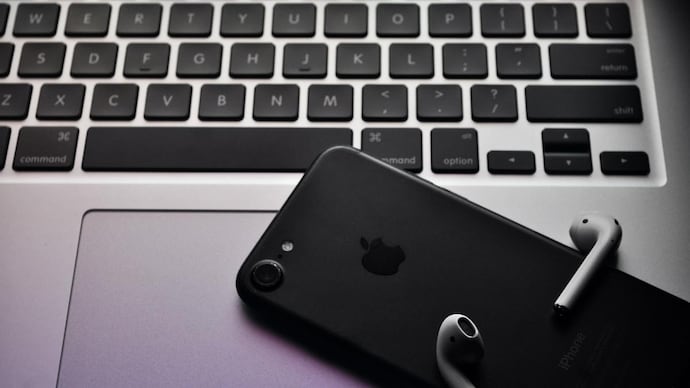
Credit: www.amazon.com
Step-by-step Guide To Connecting Airpods To A Macbook
Connecting your Airpods to your Macbook is a seamless process that allows you to enjoy wireless audio while using your laptop. In this step-by-step guide, we will walk you through each necessary step to connect Airpods to a Macbook. Let’s get started!
Step 1: Put Airpods In Their Charging Case
The first step is placing your Airpods in their charging case. This will ensure that they have enough battery life for the connection process.
Step 2: Open The Lid Of The Charging Case
Next, open the lid of the charging case. This will activate the Airpods and make them discoverable for pairing with your Macbook.
Step 3: Press And Hold The Setup Button On The Case
Locate the setup button on the back of the Airpods case. Press and hold this button until the status light on the case starts flashing white. This indicates that the Airpods are in pairing mode.
Step 4: Open Bluetooth Settings On The Macbook
Now, navigate to the Bluetooth settings on your Macbook. You can do this by clicking the Bluetooth icon in the menu bar or by going to System Preferences and selecting Bluetooth.
Step 5: Select Airpods From The List Of Available Devices
In the Bluetooth settings, you should see a list of available devices. Look for your Airpods on this list and click on them to select them for pairing.
Step 6: Click ‘connect’ To Pair Airpods With The Macbook
Once you have selected your Airpods, click on the ‘Connect’ button to initiate the pairing process. Your Macbook will establish a connection with the Airpods, and you will be able to enjoy wireless audio.
That’s it! You have successfully connected your Airpods to your Macbook. You can now listen to your favorite music, watch videos, and make hands-free calls without the hassle of wires.
Credit: support.apple.com
Troubleshooting And Additional Tips
Learn how to connect Airpods to a Macbook with this step-by-step guide. Troubleshoot any issues and get additional tips for a seamless connection.
Troubleshooting Common Connection Issues
If you’re experiencing issues connecting your AirPods to your MacBook, there are a few troubleshooting steps you can try. First, make sure that both your AirPods and MacBook have sufficient battery life. If the battery is low on either device, it may cause connectivity problems. Next, check that Bluetooth is enabled on your MacBook by going to the Apple menu > System Preferences > Bluetooth and ensuring the toggle switch is turned on. If your AirPods are still not connecting, try resetting them by holding the button on the back of the AirPods case until the status light starts flashing. Once reset, you can try connecting them again by selecting them from the list of available devices in the Bluetooth settings.Changing Airpods Settings On The Macbook
Once your AirPods are connected to your MacBook, you can customize their settings to suit your preferences. To access the AirPods settings on your MacBook, go to the Apple menu > System Preferences > Bluetooth and find your AirPods in the list of devices. Click on the “Options” button next to your AirPods’ name. Here, you can adjust settings such as the double-tap functionality, which allows you to control playback, access Siri, or toggle noise cancellation. You can also choose whether to automatically connect your AirPods to your MacBook when they are in range or switch to different audio devices.Connecting Multiple Airpods To A Single Macbook
If you want to connect multiple pairs of AirPods to a single MacBook, it is possible using macOS 10.15 or later. Each pair of AirPods will need to be connected individually. Start by connecting the first pair of AirPods following the usual pairing process. Once they are connected, open the “Audio MIDI Setup” application in the “Applications/Utilities” folder. Click the “+” button at the bottom left corner of the window and select “Create Multi-Output Device.” Tick the box next to each pair of AirPods you want to connect and click “Apply” to create the multi-output device. You can now select this multi-output device as the audio output in your system preferences.Connecting Airpods To A Macbook Pro
The process of connecting AirPods to a MacBook Pro is the same as connecting them to other MacBooks. Simply follow these steps: 1. Place your AirPods into their charging case. 2. Open the lid of the charging case and wait for the AirPods to appear in the Bluetooth settings menu on your MacBook Pro. 3. Click on the AirPods in the list of available devices and select “Connect.” 4. Once connected, you can start using your AirPods with your MacBook Pro for audio playback, making calls, and accessing Siri.Connecting Airpods To A Windows Laptop
While AirPods are primarily designed to work with Apple devices, you can still connect them to a Windows laptop. Follow these steps: 1. Place your AirPods into their charging case and close the lid. 2. Open the Start Menu and go to “Settings.” 3. In the Settings menu, click on “Devices.” 4. In the Devices menu, select “Bluetooth & devices.” 5. Click on “Add a new Bluetooth device” and wait for your AirPods to appear in the list of available devices. 6. Click on your AirPods in the list and select “Connect.” 7. Once connected, you can use your AirPods with your Windows laptop for audio playback and calls, although some features may be limited compared to Apple devices. Remember, if you encounter any issues during the connection process, refer back to the troubleshooting steps mentioned earlier to ensure a successful connection between your AirPods and your MacBook.
Credit: macgeniusb.com
Frequently Asked Questions On How To Connect Airpods To A Macbook: A Step-by-step Guide
How Do You Pair Airpods With Macbook?
To pair AirPods with a MacBook, press and hold the setup button on the back of the AirPods case for about five seconds until the status light flashes white. On your MacBook, go to Apple menu > System Preferences > Bluetooth, select your AirPods from the list of devices, and click Connect.
How Do I Connect My Airpod To My Computer?
To connect your AirPods to your computer, follow these steps: 1. Put your AirPods in the charging case. 2. Close the case and wait a few seconds. 3. Open the AirPods case. 4. Press and hold the Setup button. 5. Open your computer’s Bluetooth settings.
6. Add a new Bluetooth device. 7. Choose your AirPods from the list and click Connect.
How Do I Share Audio From My Macbook To My Airpods?
To share audio from your MacBook to your AirPods, follow these steps: 1. Open Audio MIDI Setup in Applications/Utilities. 2. Click the “+” at the bottom left and select Create Multi-Output Device. 3. Pair both AirPods to your MacBook. 4. Enjoy shared audio through your AirPods.
How Do I Access Airpod Pro Settings On Mac?
To access AirPod Pro settings on Mac, go to Apple menu > System Preferences and click on Bluetooth. Select your AirPods from the device list and click Connect. From there, you can customize options like “End call” or “Mute & unmute.
“
Conclusion
To connect your Airpods to your MacBook, simply follow the step-by-step guide provided in this blog post. By carefully executing each instruction, you’ll be able to enjoy a seamless wireless audio experience in no time. Remember to press and hold the button on the back of your AirPods case, access the Bluetooth settings on your MacBook, and select your AirPods to establish a connection.
With this simple process, you can effortlessly connect your AirPods to your MacBook and enjoy your favorite audio content hassle-free.

I write about my tech experiences to help those going through the same.